back in January this year i ordered a refurbished dyson v11 off newegg (the full model name is V11 Animal+ Cordless Vacuum) for about $300 (new ones were close to $600) and it was working great up until end of November last month. the problem was that the trigger had stopped working – it wasn’t springing back into its normal position after depressing and wouldn’t turn on the vacuum anymore.
turns out this broken trigger on the v11 is a well known issue and it’s caused by a weak plastic arm / lever on the trigger assembly. it’s frustrating because why the hell would you made such a high use component that get subjected to repeated force out of thin plastic instead of metal? or at least make the plastic arm thicker so it doesn’t just crack in less than a year of use.
thankfully because this is such a common issue there were repair tutorials online and spare parts available through ebay. i was able to finally finish the repair yesterday and in this post i’ll share what resources i used and some tips (both for others and for myself in the future if i need to do this again…)
here’s the youtube video that documents the disassembly process and required tools. just a heads up, the trigger mechanism is embedded pretty deep and requires basically an entire disassembly of the vacuum. the video is less than five minutes long but i think it took me closer to 45min to get it all apart.
tips
you WILL need all the tools mentioned in the video. definitely the long torque screw and pliers. you won’t be able to remove the trigger assembly without a pair of pliers (i tried). it will also be helpful to have some kind of gripper (things that look like tweezers but for electronics, most electronic repair tool kits will come with this) to grip on to wires later during re-assembly
buy a new complete trigger assembly with metal switch (or at the very least a metal trigger piece to replace the plastic trigger with). yes it’s pretty funny that there’s apparently an entire market providing more durable switches for the v11 than dyson themselves. in my first go at this, i did what the video suggested and tried gluing the broken trigger with superglue. i do not recommend doing this because the trigger ended up breaking immediately again and i had to repeat the entire process. maybe i didn’t let it cure long enough. maybe my super glue wasn’t super enough. whatever, just save yourself the trouble and replace the entire assembly. below is an image of one i found on ebay (note that it says v10 – it’s also compatible with v11).

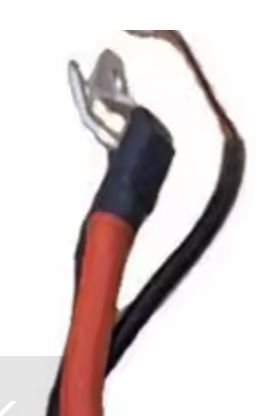
during reassembly, there will be a point where you need to straighten / bend the metal ends of the electric connectors in order to pass it through various parts of the vacuum. you’ll know what i’m talking about if you end up going through the full disassembly. try not to bend/re-bend them too many times because you can easily break off the metal ends (see below)

in my first pass at this after i had glued the trigger back together, i actually broke off the metal piece by accident when trying to bend it back and then spent over an hour trying to re-solder it back on. i also have no idea how to properly solder and ended up burning a hole in my table cloth. anyway when you’re re-connecting those metal connectors back, use your pliers to adjust them to be close to 90 degrees (as they were before you had to remove them) but it honestly doesn’t have to be perfect. just use the screws to tighten them against the motherboard.