I bought my current refurbished iPhone SE back in August 2018. It’s my favorite phone by far and I have no plans on getting a new phone. There’s a second gen SE that was released in 2022 that’s slightly bigger with a 4.7inch screen that I may consider getting in the future, but I really prefer a smaller phone and the original SE is the last iPhone from Apple to have a 4 inch screen. Last year (2022) the battery life started giving me trouble because it was losing 8-10% every hour just by having Bluetooth on.
Since it’s a refurbished phone that was over 4 years old at that point I figured it would be nice to try to replace the battery myself. If I screw up terribly I won’t feel too bad about getting a new phone and if it works out I’ll be able to squeeze maybe a few more years out of this thing.

Anyway I ended up doing it and I’m fine. Nothing exploded. My wife has the same model so I ended up replacing her battery as well and so far the phone works just like new. Here are the resources I used and tools I purchased to do this – I’ll also include some notes at the end based on my experience.
Videos
Here’s a shorter video that I used as an additional reference.
Purchases
I bought this all in one battery and repair tool kit from Amazon that worked out pretty well. I didn’t have the special Apple screw drivers and buying the kit and battery separately was more expensive so I recommend this if you’re doing it for the first time and don’t want to worry about whether you have everything you need.
If you just want to know what the essential parts are:
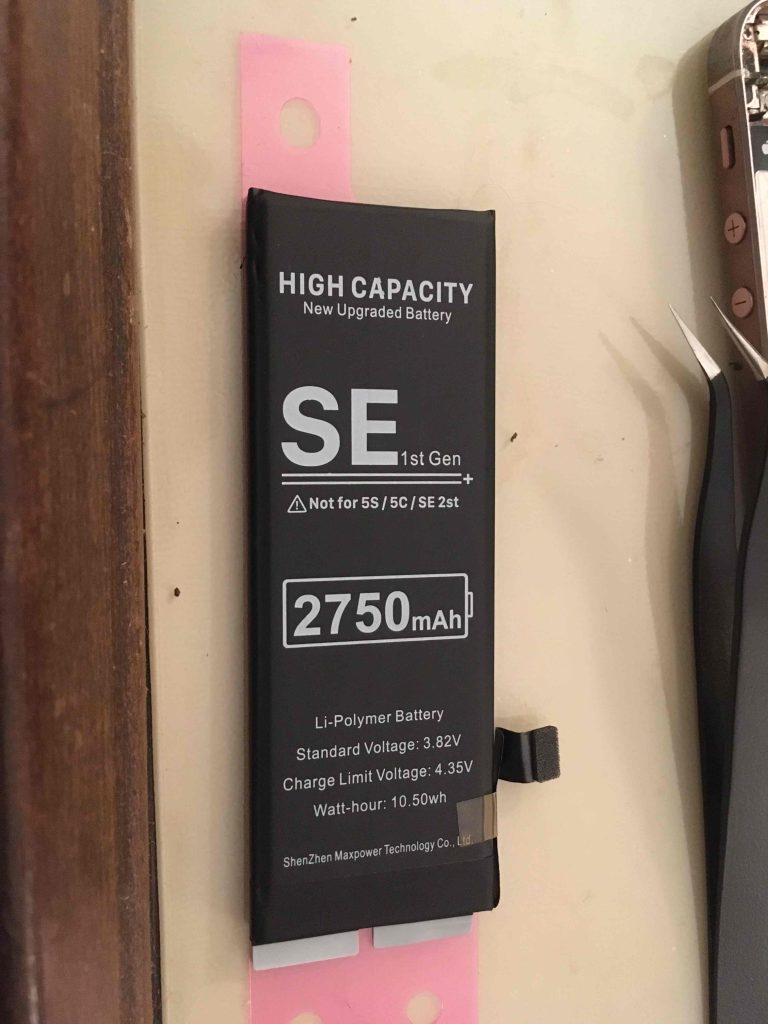
- PAISUE iPhone Replacement Battery for iPhone A1662. A1662 is the official US model for the SE but it also goes by A1723 and A1724 in other countries (you should double check this).
- Battery adhesive. This usually comes with the new battery – you’ll need it to replace the existing adhesive that’s holding the battery to the phone.
- Suction cup for removing the screen frame. It’s pretty tricky to lift the screen off initially without some sort of suction tool…
- Pentalobe screw driver for those special Apple screws.
- A small prying tool. The kit comes with this plastic triangle pick that I used to pry open the screen. Not super necessary since you can make use of plastics you already have like credit cards.
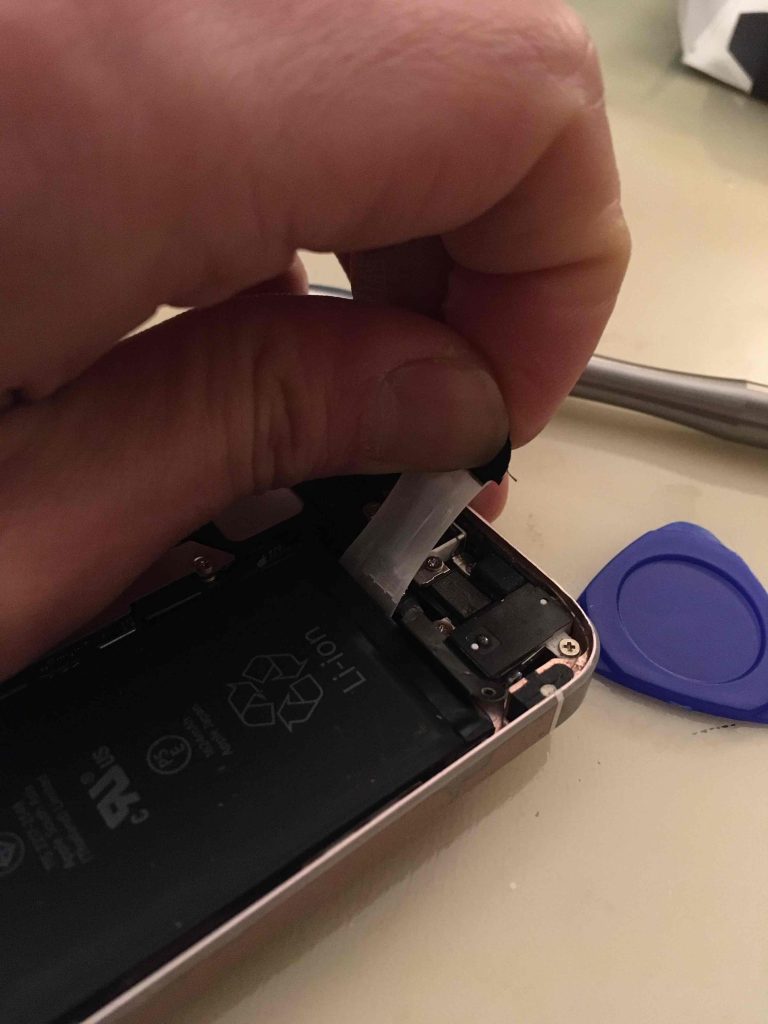
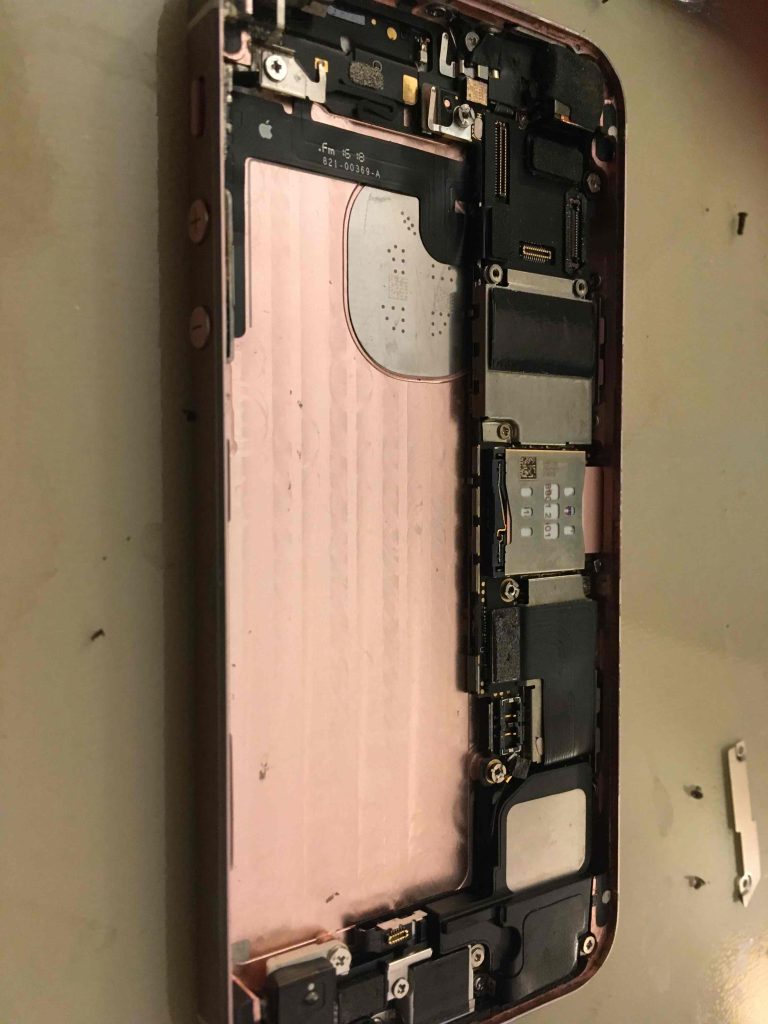
Some images from my repair
Tips
- The screen consist of two parts – make sure you lift up the entire frame of the screen and not just the screen itself. If you’re doing it right you’ll see the face of the battery underneath.
- The videos all make the adhesive removal look easier that it is. Both times I broke the adhesive either immediately or midway. Go VERY slow with the adhesive because it’s so much harder to remove the battery once it breaks. I highly recommend using some sort of warming mat to soften the glue (I used a low-heat coffee warmer the second time around and it went much smoother). The first time I did this and the adhesive broke, I ended up prying the battery (not ideal, but I felt I could do it safely since most of the adhesive had been removed). I would really just go as slow as you can because seriously if it breaks you’re like doubling your repair time.
- Make sure you lay out the various parts and screws in order and keep track of how they’re going back in. There’s at least one place holding the screen in place that has 4 tiny screws of different sizes – the first time I did it I lost track and wasted some time trial-and-erroring my way with the tiny screws.
Good luck and be safe.